In this article we will see how to set up and configure the network settings of your Raspberry Pi Zero W / 2W without having to connect a keyboard / mouse / monitor.
⚙️ Required materials#
- Raspberry Pi Zero W / 2W (W stands for WiFi)
- MicroUSB power supply (5V voltage)
- MicroSD Card (8Gb or more)
- MicroSD Card adapter (if your computer needs one)
💾 Flashing the OS into the microSD card#
First of all, you will need to download and install the official Raspberry Pi Imager software from their website.
Another alternative is the Balena Etcher software available on their website.
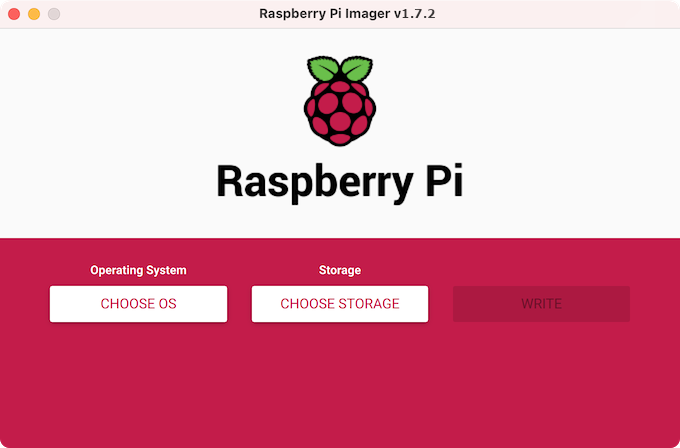
Once this is done, you can insert your microSD card in your computer and open the Raspberry Pi Imager software.
You can now choose the OS that you want to install on your Raspberry and the storage device on which you want to flash the OS you have chosen.

I strongly recommend you to choose the
Raspberry Pi OS Lite (32-bits)version if you have a Pi Zero W / 2W
When the Imager has finished writing the image to the microSD card, you will have to add two files to the root of the card storage (named boot) to allow SSH and to connect automatically your Raspberry to your WiFi.
Setting up SSH#
SSH is not enabled by default when you first boot up your Raspberry, you need to either :
- Enable it from a configuration file (requires you to plug in a monitor and a keyboard to interact with it)
- Specify it directly before you boot your device
We will choose the second option to avoid having to connect external devices to
the Raspberry. To do that, simply create a file named ssh at the root of your
microSD card.
Don’t forget to remove any extension (.txt, etc…) in the filename
Setting up WiFi#
To enable you to communicate with your Raspberry via SSH, you must connect your Pi to the same local network as your computer. Thus, we will specify to our device that we want to connect to our WiFi automatically at startup.
To enable this connection, create a file called wpa_supplicant.conf at the
root of your microSD card.
Again, don’t forget to set the file extension to .conf and to remove any other extension
Open this file with your favourite text editor (I recommend using Notepad++ for Windows users) and write the following lines in it :
country=FR
ctrl_interface=DIR=/var/run/wpa_supplicant GROUP=netdev
update_config=1

network={
    scan_ssid=1
    ssid="My_Wifi_Name"
    psk="My_Wifi_Password"
    key_mgmt=WPA-PSK
}
The values to be filled in obviously depend on your configuration :
- country : 2-letter country code
- ctrl_interface : allows the use of wpa_cli
- update_config : specifies that changes made via the command line will be saved
- scan_ssid : indicates that your WiFi network can be hidden
- ssid : name of the WiFi network
- psk : password to connect to the network
- key_mgmt : network security
More information on the syntax and other parameters are available at : https://linux.die.net/man/5/wpa_supplicant.conf
What about safety ?#
Indeed, the password is written in clear text in the file, we have known better.
I will explain how to fix this problem at the
end of this article.
🔥 Starting the Raspberry Pi#
All configurations are now complete (don’t forget to save the files), you can eject the microSD card from your computer and insert it into the Raspberry.
Turn on the power and wait a few minutes for the boot process to finish.
That’s it ✅
Your Raspberry is now connected to your WiFi network, you have several solutions to find its IP address :
- Use the interface of your box / router
- Use a tool to scan your network (I don’t use one, but a little research on the Internet will give you a list of softwares)
Then, you just have to connect with SSH to your Pi to check that everything works correctly.
The default credentials are :
- login =
pi - password =
raspberry
The keyboard is set to QWERTY by default. If you are using an AZERTY keyboard, remember to type “rqsberry” for the password.
🔗 Connecting with SSH#
Now your Raspberry is turned on and connected to your WiFi network, just like your computer. The next step is to connect to your Raspberry with SSH.
Linux#
If your computer is running Linux, this is relatively simple.
Open a new terminal and type the following command :
ssh pi@[My_Raspberry_IP]
Press Enter and you should be connected to your Raspberry.
Windows#
If your computer is running Windows, you have two possibilities to connect to your Raspberry with SSH :
- Use a command prompt (cmd.exe or powershell.exe) and perform the same operation as for Linux
- Use an SSH client (I recommend using PuTTY)
🔒 Securing the configuration#
As we have seen during the network configuration, the password is written in
clear text in the wpa_supplicant.conf file.
Let’s see how to correct this.
Linux#
If your computer is running Linux, you can do this before the first boot of your Raspberry.
In a terminal, type the following command :
wpa_passphrase [My_Wifi_Network]
Fill in your password and press the Enter key.
You will obtain the basic configuration for your network :
network={
    ssid="My_Wifi_Name"
#   psk="My_Wifi_Password"
    psk=MyEncryptedWifiPassword20bcc0a49c60be5b87c27349d05bbf998076b70196af53b62
}
All you have to do is :
- Simply copy this configuration into the
wpa_supplicant.conffile - Delete the comment line with the password in clear text
- Complete the configuration with other parameters : country, scan, etc…
Windows#
When the Raspberry is running, connect to it using SSH.
Once connected, as above, run the following command :
wpa_passphrase [My_Wifi_Network]
Enter the password when prompted, then edit the
/etc/wpa_supplicant/wpa_supplicant.conf file and replace the password with the
encrypted one returned by the previous command.
Reboot the Raspberry and you’re done !

